 how-to
How to Clean Baseboards Easily: A Complete Guide
Table of Contents
- What You'll Need to Clean Baseboards Easily
- Baseboard Cleaning Tools That Save Time and Effort
- Step 1: Remove Loose Dust and Debris
- Step 2: Wipe Down with a Damp Microfiber Cloth
- Step 3: Tackle Scuffs and Stubborn Marks
- How to Clean Baseboards Without Bending
- How Often to Clean Baseboards for Best Results
- Common Mistakes to Avoid When Cleaning Baseboards
- Frequently Asked Questions
Last Updated: October 20, 2026
What You'll Need to Clean Baseboards Easily
To clean baseboards easily, start with the right tools on hand, they make the job faster and less physically demanding.
Here's what we recommend gathering before you start:
- Extendable duster or microfiber cloth
- Vacuum with upholstery attachment
- Soft-bristle brush or old toothbrush
- Spray bottle with warm water and mild dish soap
- Multipurpose cleaner or gentle household cleaner
- Dry microfiber cloths for final polish
- Optional: baking soda or white vinegar for stubborn marks
Choose tools that reduce bending and reaching. An extendable duster or long-handled microfiber cloth eliminates most strain, you can stand upright and work along the trim without crouching or kneeling.
Keep supplies in a caddy or bucket so you can carry them room to room, saving time and staying organized.
Baseboard Cleaning Tools That Save Time and Effort
The right tools transform this task from tedious to manageable. Here's what works, what each tool is safe on, and the trade-offs.
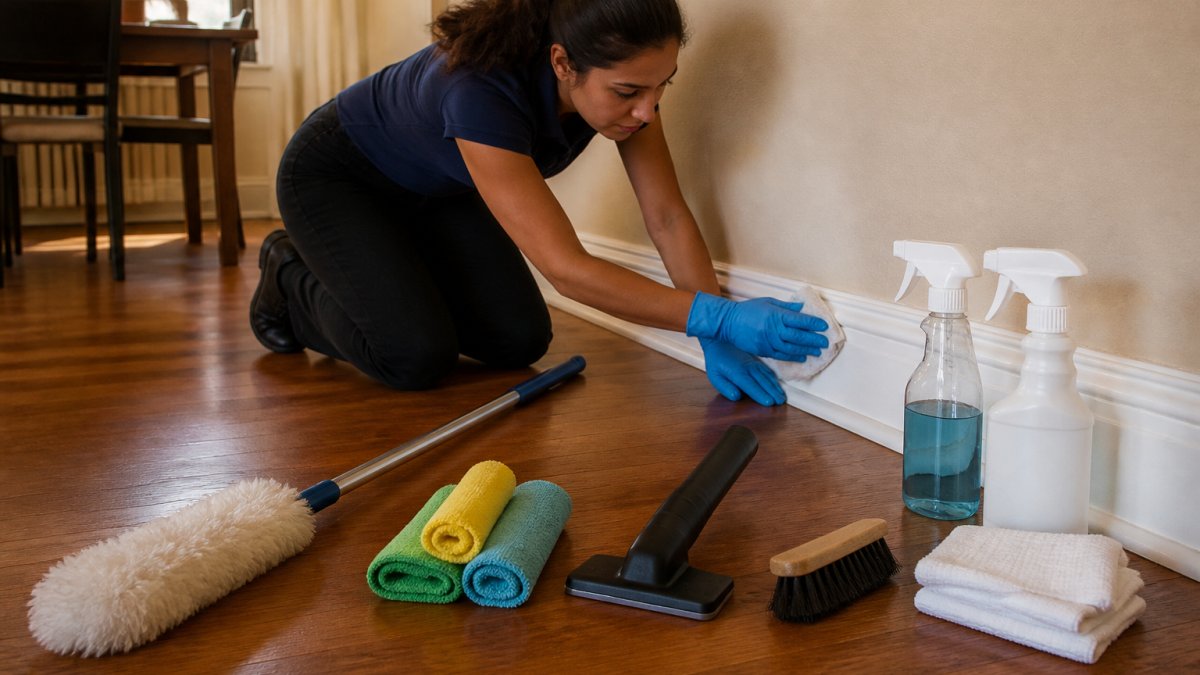
Extendable dusters reach high baseboards without a step stool and work best for light dust on painted wood, MDF, and vinyl. Trade-off: poor at removing sticky residue or matted pet hair.
Microfiber cloths are your workhorse: dampen one slightly and wipe along the trim, they trap dirt without streaks or lint. Keep several on hand and color-code them (one for damp wiping, one for drying) to avoid cross-contamination.
Vacuum attachments handle loose debris fast. Use the upholstery brush or crevice tool to pull up pet hair, dust, and dirt first, the brush is gentler on painted trim, the crevice tool reaches the gap where baseboard meets floor.
Soft-bristle brushes or old toothbrushes work for corners, grooves, and edges where cloths can't reach, keep one dry for dust and one damp for grime. Trade-off: bristles can flick debris onto the wall, so work slowly with a vacuum nearby.
Multipurpose cleaner or mild dish soap in warm water handles most scuffs and stains. Spray onto your cloth, not the baseboard, to prevent liquid seeping behind the trim.
Baking soda is a mild abrasive for scuffs on painted trim: make a paste with water, apply, and rub gently with a soft cloth.
Ergonomic trade-offs. A long-handled microfiber cloth or extendable duster lets you stand upright for most of the trim. A vacuum with a long wand and brush attachment reduces bending more than a handheld but is heavier around furniture.
Quality microfiber cloths last years and work better than paper towels or old rags; a set of five or six means you always have a clean one. Store tools in a caddy to avoid repeated trips.
Step 1: Remove Loose Dust and Debris
Start by removing loose dust and debris, the fastest part of the process, and it sets up easier cleaning in the next steps.
Run your vacuum with the upholstery attachment along each baseboard, moving slowly so the brush captures dust, pet hair, and debris. Pay extra attention to corners where dust accumulates.
No vacuum attachment? An extendable duster works too, wipe with downward strokes to push debris toward the floor, then sweep it up.
This step is crucial with pets: hair clings to baseboards and becomes harder to remove once it mixes with moisture, so vacuuming first prevents matted hair later.
Step 2: Wipe Down with a Damp Microfiber Cloth
Next, wipe down your baseboards with a damp microfiber cloth to remove dust the vacuum missed and handle light stains.
Dampen your microfiber cloth with warm water only and wring it out so it's damp, not wet, excess water can damage paint or seep behind the trim.
Wipe along the entire baseboard with long, smooth strokes, working top to bottom so gravity moves dirt downward. Flip your cloth frequently to use a clean section.
For textured or grooved baseboards, run your cloth into the crevices to pull out trapped dust, this is where detail matters most.
When your cloth gets visibly dirty, rinse and wring it out, a clean cloth beats pushing around dirty water.
Let the baseboard air dry a few minutes before the next step, this prevents streaks and shows what still needs attention.
Step 3: Tackle Scuffs and Stubborn Marks
Scuffs and stubborn marks need targeted treatment with a gentle cleaner, since not every mark comes off with water alone.
Mix warm water with a few drops of mild dish soap in a spray bottle, it handles most household marks without damaging paint or finishes. Spray onto a microfiber cloth, never directly on the baseboard.
Wipe the scuff with gentle pressure; most marks come off in a few passes. If one persists, let the soapy cloth sit on it for 30 seconds to soften the debris.
For marks that resist soap and water, try a multipurpose cleaner designed for painted surfaces, test it on a hidden area first and follow the product instructions.
Baking soda works for tough scuffs on painted baseboards: mix a paste with water, apply to the mark, and rub gently with a soft cloth, this mild abrasive removes scuffs without scratching the paint.
Use a soft-bristle brush or old toothbrush for marks in corners or grooves, gentle circular motions work better than scrubbing hard.
After treating stubborn marks, wipe the area with a clean damp cloth to remove residue, then dry with a microfiber cloth for a polished finish.
How to Clean Baseboards Without Bending
Bending repeatedly while cleaning baseboards easily becomes painful for your back and knees. The right tools and technique eliminate most of this strain.
An extendable duster or long-handled microfiber cloth adds 2 to 3 feet of reach, so you can clean the entire baseboard length standing upright without crouching or kneeling.
A knee pad or small cushion helps if you must kneel for detail work, kneeling strains less than repeated bending. Place the pad where you're working so you can move along without standing up constantly.
A low step stool helps with high baseboards or trim, standing keeps your back straighter than bending over. Move the stool as you work rather than overreaching.
Work in sections: clean one wall completely before moving to the next, avoiding repeated back-and-forth movement and fatigue.
The right method is faster and less painful than fighting the task.
Pace yourself: breaks prevent fatigue that leads to poor form and injury, and a steady 30 minutes beats rushing through in 15.
How Often to Clean Baseboards for Best Results
How often you clean baseboards depends on your household and environment. Most homes benefit from cleaning every 3 to 6 months, but the right schedule is a function of pets, children, dust sources, and room use. Here's how to set your own cadence.
Start with a baseline. Vacuum or dust monthly in high-use rooms and every 3 months in low-use rooms, then adjust: if a white cloth comes away gray after a quick wipe, you're overdue; if it stays mostly clean, stretch the interval.
Households with pets. Hair and dander settle faster, especially along hallways and near pet beds. Every 2 to 3 months works better with shedding dogs or cats, and monthly vacuuming in pet areas prevents matted hair from bonding to the trim.
Households with children. Fingerprints, craft residue, and scuffs show up at child height. Wipe high-touch baseboards monthly with a damp microfiber cloth and mild dish soap, and spot-clean marks as they appear rather than waiting for a deep clean.
High-traffic areas. Entryways and main hallways get dirtier faster and may need cleaning every 2 to 3 months while bedrooms go longer. A quick vacuum pass in entryways every few weeks keeps grit from being ground into the finish.
Dust-prone environments. Homes near busy roads or in arid climates accumulate dust faster. Monthly or every 6 weeks keeps baseboards looking fresh. Keep exterior doors closed when possible and use a doormat to reduce tracked-in dust.
Seasonal patterns. Spring and fall cleanings catch seasonal dust. Pay extra attention after winter, when heating circulates more dust, and after summer, when windows are open more often. With forced-air heating and cooling, changing the filter on the manufacturer's schedule reduces dust settling on trim.
A simple maintenance system. Spend 10 minutes per room monthly: vacuum the baseboard line and wipe with a damp cloth. This prevents heavy buildup and makes deep cleaning easier. Keep a microfiber cloth and small spray bottle in each caddy so the task is never more than a few minutes away.
Regular cleaning prevents stubborn marks and stains that are harder to remove later, a little maintenance regularly beats intensive scrubbing occasionally.
Common Mistakes to Avoid When Cleaning Baseboards
Knowing what NOT to do prevents damage and wasted effort. Here are the most common mistakes.
Using too much water is the biggest mistake, it can damage paint, swell wood, or warp vinyl. Always wring out your cloth thoroughly before wiping.
Skipping dust removal spreads dirt instead of removing it. Always vacuum or dust first, it makes the wet-cloth stage much more effective.
Using harsh chemicals on delicate finishes damages paint and trim. Stick with mild dish soap and water for most situations. Test any new cleaner on a hidden area first.
Scrubbing too hard scratches paint and damages the surface. Gentle pressure with the right tool beats aggressive scrubbing, let your cleaner do the work rather than muscle.
Cleaning in the wrong order wastes time. Always go vacuum, damp cloth wipe, then treat stubborn marks, reversing it means re-cleaning finished areas.
Not letting cleaners sit long enough. If a mark resists, let your damp cloth sit on it for 30 seconds to soften the debris so it wipes away easier.
Ignoring corners and grooves leaves dirty spots visible. These areas trap the most dust and debris. A soft brush handles them better than a cloth alone.
Cleaning only the visible surface misses the top edge where dust settles. Wipe the top of the baseboard and the wall surface just above it. These areas collect surprising amounts of dust.
Cleaning baseboards easily becomes routine with the right approach: proper tools, systematic work, and regular maintenance so they never get too dirty.
When baseboard cleaning feels overwhelming or you'd rather focus on other priorities, professional cleaning services handle it thoroughly. Top Royal Cleaners has cleaned baseboards and trim in homes across the region for over 15 years. We know how to protect your surfaces while delivering spotless results. With our pet-friendly approach and fully licensed, insured team, you get peace of mind knowing your home is in experienced hands. Get a quote and see how we can save you time while keeping your baseboards looking fresh.
Frequently Asked Questions
What is the easiest way to clean baseboards?
Start by removing loose dust with an extendable duster or vacuum attachment, then wipe with a damp microfiber cloth. For stubborn marks, use a mild mixture of warm water and dish soap. This two-step approach is the fastest method for most homeowners and requires minimal bending or scrubbing.
How often should you clean baseboards?
Light dusting every 2-4 weeks keeps baseboards looking fresh and prevents heavy dirt buildup. Homes with pets or high foot traffic may need weekly dusting. A deeper cleaning with soap and water works well once or twice per year, depending on your home's conditions and how much dust accumulates.
How do you remove scuff marks from baseboards?
For light scuffs on painted baseboards, try a magic eraser or a soft cloth with warm soapy water. For stubborn marks, mix equal parts white vinegar and water, or use a multipurpose cleaner designed for your baseboard material. Test any solution on a hidden area first to ensure it won't damage the finish.
Do dryer sheets keep dust off baseboards?
Yes, dryer sheets can help reduce dust accumulation. Their anti-static properties make dust less likely to cling to surfaces immediately after wiping. Wipe baseboards with a used dryer sheet after dusting, or use a microfiber cloth treated with a light dusting spray for similar results.