 how-to
7 Ways to Clean Wooden Blinds Without Damaging Finish
Last Updated: November 1, 2026
Quick Summary
The best way to clean wooden blinds without damaging finish is to use almost no water and patch test every product on a hidden slat first. Dust dry, wipe with a barely damp microfiber cloth, and use only a mild cleaner diluted weak, never sprayed directly on the wood.
- Mix a few drops of gentle dish soap in warm water, roughly a teaspoon per quart.
- Dust from the top slat down, working both sides so debris falls onto lower slats.
- Keep blinds installed for routine cleaning; remove them only for deep cleaning.
- Wait five minutes after a patch test and check for dulling, tackiness, color transfer, or haze.
- Never test a cleaner on a slat face in direct sun, since heat skews results.
Table of Contents
- Start With the Right Supplies and a Finish Test
- How to Dust Wooden Blinds From Top to Bottom
- How to Clean Blinds Without Taking Them Down
- How to Remove Grease From Wooden Blinds Safely
- Real Wood vs. Faux Wood: A Finish-Safe Decision Guide
- Book a Professional Deep Clean for Stubborn Blinds
- Frequently Asked Questions
Start With the Right Supplies and a Finish Test
The best way to clean wooden blinds without damaging finish comes down to two habits: use almost no water, and test every product on a hidden slat first. Moisture is one of the most common mistakes people make when cleaning blinds. Real wood swells, warps, and clouds when water sits on it, so dust dry first, wipe with a barely damp cloth second, and use a finish-safe product only after a patch test.
Here is what to gather before you start:
- A microfiber cloth or a soft duster
- A clean sock for hand-wiping slats
- A mild cleaner, diluted and never sprayed directly on wood
Choosing the Best Cleaner for Wooden Blinds
The best cleaner for wooden blinds is a mild one: a few drops of gentle dish soap or laundry soap in a bucket of warm water, mixed weak rather than strong. Skip harsh solvents, bleach, or ammonia, which strip the finish and leave dull patches. A dry microfiber cloth handles most dust; when you use a diluted solution, wring the cloth until it is nearly dry.
Patch Test Before You Touch a Single Slat
Test first, always. Pick a slat near the bottom or back where nobody looks, and wipe a small spot with your chosen cleaner. Wait a few minutes and check for dulling, tackiness, or color change. If the finish looks the same once dry, continue; if it clouds or feels sticky, stop and switch to plain water or a dry method.
How to Dust Wooden Blinds From Top to Bottom
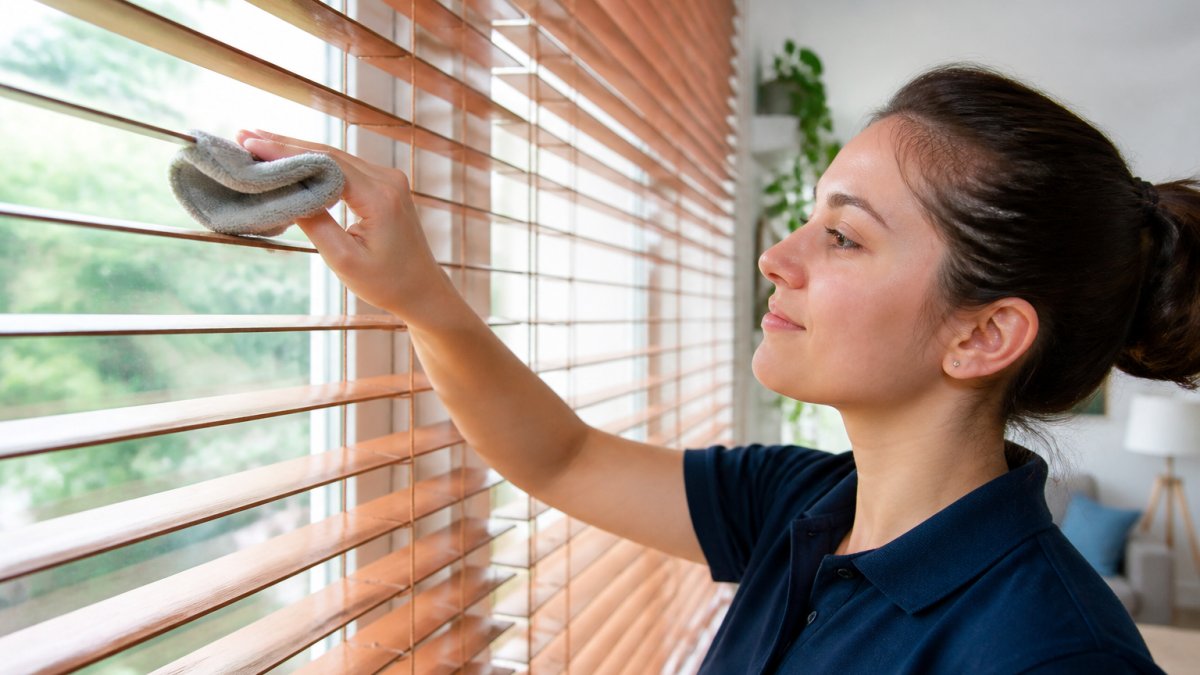
Dust wooden blinds from the top slat down, working both sides of each slat, so debris falls onto the slats below rather than the ones you just cleaned.
A few habits that make dusting quicker:
- Slip a clean sock over your hand and pinch each slat, wiping both sides in one pass
- Use a vacuum brush attachment on low suction for heavy dust buildup
- Dust the cords and drawstrings too, since they collect debris
Dust returns fast in busy rooms. A quick weekly pass keeps it from turning into a deep cleaning job.
How to Clean Blinds Without Taking Them Down
You can clean blinds without taking them down for routine surface cleaning, and that is how most people should handle it. For a full pro method covering wood, vinyl, and fabric, see our guide on how to clean blinds effectively.
When should blinds come down? Only for deep cleaning or when the headrail and cords need attention. Removing them is more work and raises the risk of bending slats or stripping the mounting hardware.
How to Remove Grease From Wooden Blinds Safely
Grease needs a targeted approach, not a soaked rag. Kitchen blinds collect a sticky film from cooking, and the fix is a small amount of mild grease-cutting soap on a cloth, applied to the spot only. Wipe gently, then buff dry right away. Never flood the slat with water or spray cleaner, because liquid runs into the joints and finish edges where damage starts.
Step-by-Step for Grease and Cooking Film
- Dust first. A dry microfiber cloth removes loose dust so the grease remover is not fighting debris.
- Mix weak. Add a few drops of gentle dish soap to a bucket of warm water, roughly a teaspoon per quart. Concentrated soap leaves a residue that attracts new dust.
- Wring nearly dry. The cloth should feel barely damp. If you can wring a drop out of it, it is too wet for real wood.
- Work the spot, not the slat. Fold the cloth to a clean edge, wipe the greasy area in one direction, then flip to a dry section and buff immediately.
- Dry the edges. Run a dry cloth along the slat edges and the cords, where moisture hides.
For a heavier film, let the damp cloth rest on the spot for 30 seconds before wiping, do not scrub. Scrubbing dulls the finish and drives grease into the grain.
Sticky Residue From Tape, Labels, or Spills
Dampen a cloth with the diluted solution and hold it on the spot before wiping. If residue remains, a small amount of rubbing alcohol on a cloth, applied to the cloth, never the slat, can break down adhesive, but test it first on a hidden slat because alcohol can dull some lacquers. Work in small sections and buff dry. Never use a scraper, razor, or abrasive pad on a finished slat.
When to Stop and Call a Professional
If the grease does not lift with gentle effort, stop rather than scrub. Scrubbing dulls the finish, and a finish that is already tacky or worn will absorb grease and stain permanently. Signs it is time to hand off: grease that returns within days, a sticky film across multiple slats, or a finish that feels soft. In that case, a professional deep clean is the safer route, our team handles deep cleaning that tackles the grime, dust, and buildup routine cleaning leaves behind.
Real Wood vs. Faux Wood: A Finish-Safe Decision Guide
Real wood and faux wood are not interchangeable when it comes to cleaning, and treating one like the other is the fastest way to ruin a finish. The table below gives the quick comparison; the paragraphs that follow explain the mechanisms so you can make a safe call on blinds you did not install yourself.
| Feature | Real Wood | Faux Wood |
|---|---|---|
| Core material | Solid wood or wood veneer over a core | PVC, vinyl, or a composite |
| Water tolerance | Very low; wring cloth nearly dry | Moderate; tolerates a damp wipe |
| Best cleaner | Mild soap, diluted, patch tested | Mild soap or gentle spray cleaner |
| Main risk | Water damage, warping, finish clouding | Streaking, dulling from residue |
| Dusting method | Soft cloth or duster, dry first | Microfiber cloth, dry or damp |
| Deep cleaning | Hand wipe only, dry immediately | Can tolerate a slightly wetter cloth |
| Weight signal | Lighter, warmer to the touch | Heavier, cooler, uniform grain |
How to Tell Which You Have
Look at the end of a slat or the underside of the bottom rail. Real wood shows a continuous grain pattern that wraps around edges and varies from slat to slat; faux wood has a printed or embossed grain that repeats and often looks identical across slats. Tap a slat: real wood sounds warmer and lighter, while faux wood sounds denser and cooler.
Identify the Finish Before You Clean
Most wooden blinds carry one of three finishes: a clear lacquer or polyurethane, a stained-and-sealed finish, or a painted finish. Each reacts differently to moisture and cleaners.
- Clear lacquer or polyurethane: Looks glossy or satin and feels smooth. These are the most water-sensitive; standing moisture can cloud the film or raise the grain at edges.
- Stained and sealed: Shows visible grain color under a topcoat. The seal is the barrier, if it is worn or tacky, the wood underneath is exposed and will stain.
- Painted: Opaque color with no visible grain. Paint can chip at slat edges, and harsh cleaners soften or lift it.
Run a fingertip along a slat edge. A sticky or tacky feel means the finish is failing and should not be wet-cleaned until it is repaired.
The Inconspicuous Patch Test
Pick a slat near the bottom or back of the window where a mark will not show. Wipe a quarter-sized spot with the cleaner on a white cloth, wait five minutes, then buff dry. Check for four failure signs: dulling of the sheen, a tacky feel, color transfer onto the cloth, or a cloudy haze. If any appear, stop and switch to plain water or a dry method.
Matching the Method to the Material
The rule of thumb: treat real wood like fine furniture and faux wood like vinyl. For real wood, dust dry first, use the least moisture possible, and dry immediately with a second cloth. For faux wood, a damp microfiber wipe is fine, but buff dry to prevent streaks. When in doubt, go drier, gentle cleaning with less water always beats a thorough soak, and a dry method that takes two passes is cheaper than refinishing a window of slats.
Book a Professional Deep Clean for Stubborn Blinds
Some blinds are past the point where DIY pays off. Our team handles deep cleaning for homes and businesses. If you are weighing the trade-offs, our comparison of professional vs DIY deep cleaning covers cost, time, and results.
We are fully licensed and insured, and we are pet-friendly in our approach. You can get a quote or browse our cleaning FAQs for answers on scheduling. First-time customers get 20% off.
Frequently Asked Questions
What is the safest way to clean wooden blinds?
The safest method is dry dusting first with a microfiber cloth or duster, working from top to bottom. For deeper cleaning, use a barely damp cloth with a mild solution of water and a few drops of dish soap, then dry immediately. Avoid soaking the slats, and never use harsh chemicals, bleach, or abrasive scrubbers, because excess moisture and strong cleaners can warp real wood and strip the finish.
Can you use water to clean real wood blinds?
You can use water, but sparingly. Wring your cloth until it is almost dry before wiping each slat, and dry the surface right after. Standing water or a dripping cloth can seep into the wood grain, cause swelling, and damage the finish. For routine cleaning, dry dusting is usually enough. Save the damp wipe for sticky spots and greasy buildup, and always test a hidden slat first.
How often should you dust wooden blinds?
Dust wooden blinds every two to four weeks to stop buildup before it bonds to the finish. Homes with pets, open windows, or high humidity may need weekly dusting. A quick pass with a microfiber cloth or duster keeps dust from settling into the grain. Deep clean with a mild solution two to four times a year, or sooner if you notice grease or sticky residue near the kitchen.
What cleaner is safe for finished wooden blinds?
A mild solution of water with a few drops of gentle dish soap is safe for most finished wooden blinds. Avoid bleach, ammonia, vinegar in high concentrations, and abrasive cleaners, because they can dull or strip the finish. Always patch test on a hidden slat first. For grease, use a small amount of degreasing dish soap on a barely damp cloth, then wipe dry immediately to protect the wood.
Your blinds should not be a source of stress. If the finish is already showing wear or the grease will not budge, let Top Royal Cleaners take over. Our team brings 15+ years of experience, fully licensed and insured service, and pet-friendly care to every job, so you get spotless spaces and total peace of mind. Get started with Top Royal Cleaners and book a deep clean that protects your blinds and your time.